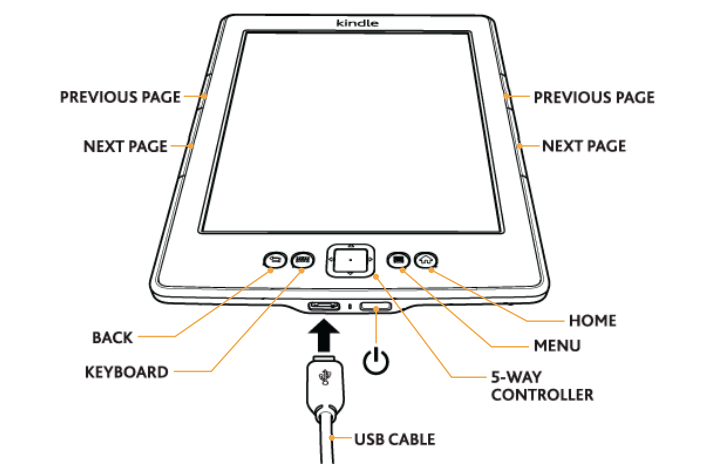
USB / charging port : Use the included USB cable to charge the battery and computer file transfer to a computer .
Power button :
Kindle Paper White turned off or putting the computer to sleep mode .
Using the touch screen
Kindle Paper White ebook reader touch screen support . To select an object , simply touch it . With
Kindle Paper White you can completely turn the page of a book while holding the device with one hand .
Portrait mode ( vertical screen )
Landscape mode ( horizontal display )
Tip : You can also turn pages by sliding your finger across the screen . To turn the next page , slide your finger from right to left across the screen . To return to the previous page , slide your finger from left to right across the screen .

Use the supplied cables to connect the Kindle to your computer to charge or transfer files . You can use a 3rd party charger if they're compatible or buy extra charger genuine win for Amazon Kindle .
When the device is charging , a lightning bolt appears on the battery icon on the top of the screen sect .
Charging by Amazon genuine charger takes approximately 3 hours .
Charger with 03 charging party or through a computer USB will take around 4 hours or possibly longer depending on the charging device .
How to Turn On / Off for Kindle Paper White or turn on Sleeping Mode
Power button below to use the Kindle / off or sleep mode .
To turn the Kindle Paper White :
Press and release the Power button
Genuine Leather case for Amazon Kindle Paperwhite has the ability to automatically turn off , turn on the Kindle screen when closing or opening the pouch .
Putting on Sleep mode :
Press and hold the power button until the screensaver appears, then release. Or the Kindle will be put on sleep mode after a few minutes of no use .
Paperwhite genuine leather bag can automatically put the computer to sleep mode when closed.
Shutdown :
Press and hold the power button for several seconds until the white backlight . The battery life of the Kindle between Sleep mode and off mode is similar .
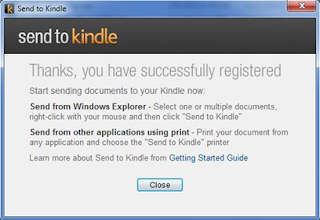
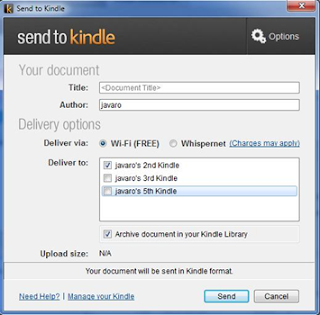
How to Sign Up for Amazon account for your Kindle Paper White
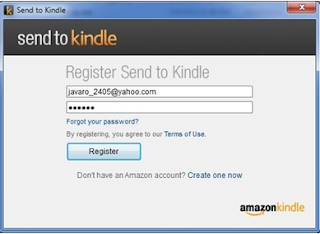
When registering the Amazon.com Kindle account , you will be able to purchase and download content from Amazon . If your Kindle is a gift or buy it from someone, you may need to interrupt register ( deregister ) prior to re-register it with your own account .
You can subscribe or unsubscribe Paperwhite Kindle device or on the Manage Your Kindle through Amazon.com .
Note: You need to connect the Kindle with wifi to register or to unsubscribe from the device .
To register for the device :
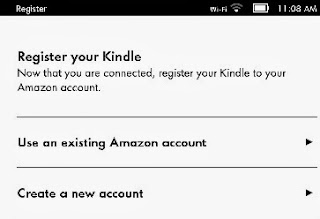
From the Home screen , select Menu , then select Settings
In the Registration section , you will see the data your Kindle was registered or not . If it is , then select Registration Unregistered .
Choose an option or account registration is available or create a new account and follow the instructions .
When the Kindle was registered to your account , you will see your device name in the upper left corner of the screen and your name in the section Registration Statistics .
To unsubscribe Kindle Paper White :
From the Home screen , select Menu and then select Settings
Registration Choose , and select Deregister .
Use the toolbar
Slide from top to bottom to see the toolbar . The toolbar will appear different depending on the screen you are using .
At the main screen :
If you are reading :
If you 're reading books, newspapers :
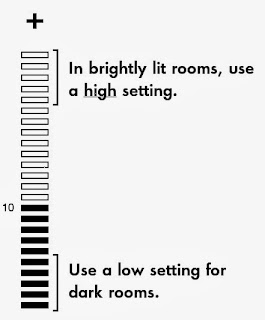
How to Adjust the screen brightness
The screen of the Kindle paperwhite provide convenient options for reading in dimly lit environments . E Ink screen of the Kindle Paperwhite brings sharpness , anti-glare and perfect reading experience whether lights or no lights .
To use the backlight , while readers selected .
Slide the hand along the ladder looking up to adjust the light brightness .
Tap and hold the - button to switch on the minimum brightness . Note: Even in low light mode , light is not completely off unless you put the Kindle to sleep mode .
Tap and hold the + button to turn the screen at the brightest .
Tip : Low brightness suitable for reading in low light rooms and higher levels suitable for rooms with high brightness .
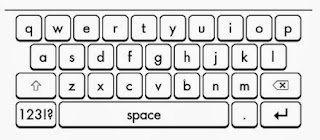
Use the virtual keyboard
Virtual keyboard appears at the bottom of the screen when you tap the Search field in the toolbar or start other tools required input .
To use the keyboard :
Select and press the number and character .
Choose to return to the standard keyboard.
Choose the Shift ( up arrow ) to enter the capital letters .
To enter characters from non-English , press and hold a key related to the character relevant non-English language and select the desired character .
Autofill from
To help ease data entry , you 'll see the words appear on the virtual keyboard , which you may have typed before, simply tap from which to choose ..
Keyboard with other languages
From the Home screen , select Menu and then select Settings
Select the Device Options , then select the Languages and Dictionaries .
Select Keyboards , and then select the keyboard box that you want to add.
Click OK to save the settings keyboard .
Tip : When you use the keyboard, you will see the keyboard icon design space . Press this key to switch back and forth between the table phim.Set
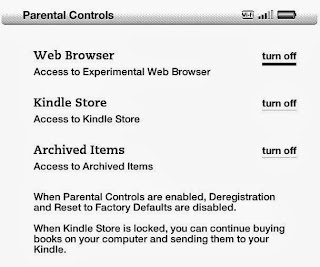
Parental Controls
Parental Controls restrict access to the Web , the Kindle Store and Cloud . Use this function to prevent other people can not buy content , access to downloaded content on your device or browsing online.
To use Parental Controls :

From the Home screen select Menu , then select Settings
Select the Device Options , then Parental Controls .
Choose Off to enter the password required to access any options in the Parental Control section ( Web Browser , Kindle Store , Cloud ) .
Set the password for Parental Controls and then select OK .
Tap on OK to save the settings of Parental Controls .
When the mode is set Parental Controls :
A lock icon appears at the top of the screen :

Deregistration function , Reset Device , the Kindle Store and will not be used .
If you forget your password for Parental Controls : you will have to reset the original default Kindle by pressing resetmykindle in password entry for Parental Controls . After reset the default Kindle , you will need to re-register and re-download the content for it .
Set password
You can set a password to not allow others to use the Paperwhite her . You will need to enter the password every time your turn on the Kindle .
To set a password :
Tum Home screen , chon.Menu , then select Settings
Select the Device Options , and then select Device Passcode .
Enter and confirm the password , then select OK .
To set the name for the Kindle :
From the Home screen select Menu , then select Settings
Choose Options and select Personalize Your Device Kindle .
Select the Device Name field, enter a name that you like and then select Save .
Name of the Kindle Paperwhite will appear at the top left corner of the screen .
Changing the default dictionary
You can copy more different dictionaries for the Paperwhite her , then simply change the default dictionary that you want
To change the default dictionary :
From the Home screen , select Menu , then select Settings
Select the Device Options , and then select Language Dictionaries .
Choose Dictionaries and choose a default dictionary that you want .
Choose OK . Your Kindle restarts with menus in the selected language .
How to Turn off Wi - Fi
Airplane Mode turns off the wireless connection on your Paperwhite . You can use this feature to turn off wireless at all times .
To turn on Airplane Mode :
From the Home screen , select Menu , then select Settings
Select On next to Airplane Mode mode . When Airplane Mode mode is enabled , an icon will appear on the plane of the screen corners on Kindle Paperwhite next to the battery icon .
Choose Off to restore wireless connectivity .
Read more at Manual user guide for Kindle Paper White


.png)
2.png)


